Case Study 1: Insulating Commercial Offices
Introduction:
Our customer purchased this building in Dronfield as a development opportunity. The building required a complete refurbishment as the offices had not been used for several years. The customer purchased this building to convert the space into contemporary offices, to rent. On the ground floor there was office space, and on the lower ground floor further office space and ancillary space. Total square footage of the building was: 2,050.
Although the customer was not required to satisfy building control standards, the customer wanted to ensure that the building was thermally efficient. This was to save on unnecessary costs in the future. Given the customer was undertaking a commercial development, it was key to consider the time it would take to get a return on the insulation investment. The customer therefore insulated the Walls, Floors and Roof – to ensure there was no avoidable energy wastage.
See below details of how the building was insulated to achieve the maximum thermal benefits in this commercial building.
Insulating the Floors – Concrete and Floorboards.
The floor was inconsistent, some areas of the floor had concrete whilst others had floorboards. This was not an issue as the product used; Eco-Tec FloorFoam – can be used to insulate the floor irrespective of the surface.
Eco-Tec FloorFoam Product Details
The product; FloorFoam can be used to prevent condensation and drafts, whilst also lessening the transfer of heat & sound. The product generates significant thermal benefits, owed to its Highly Reflective True Aluminium Foil on both sides and its 4mm dense foam.
Many customers opt to use FloorFoam on the floor as it is only 4mm thick so you don’t raise the floor height, and you are unlikely to have to trim your doors. You can then apply carpet, laminate or timber flooring.
Eco-Tec FloorFoam is very easy to install, see below details / view our ‘how to’ installation video by clicking HERE .
Installing FloorFoam, on to Floorboards
In the rooms where there were floorboards: the FloorFoam was installed by starting in one corner of the room, rolling out the insulation to the desired length and once in place stapled using a Heavy-Duty Staple Gun, and 14mm staples.
The FloorFoam was then Taped and Sealed using Thermaseal Foil Joining Tape – which is supplied free with every roll.
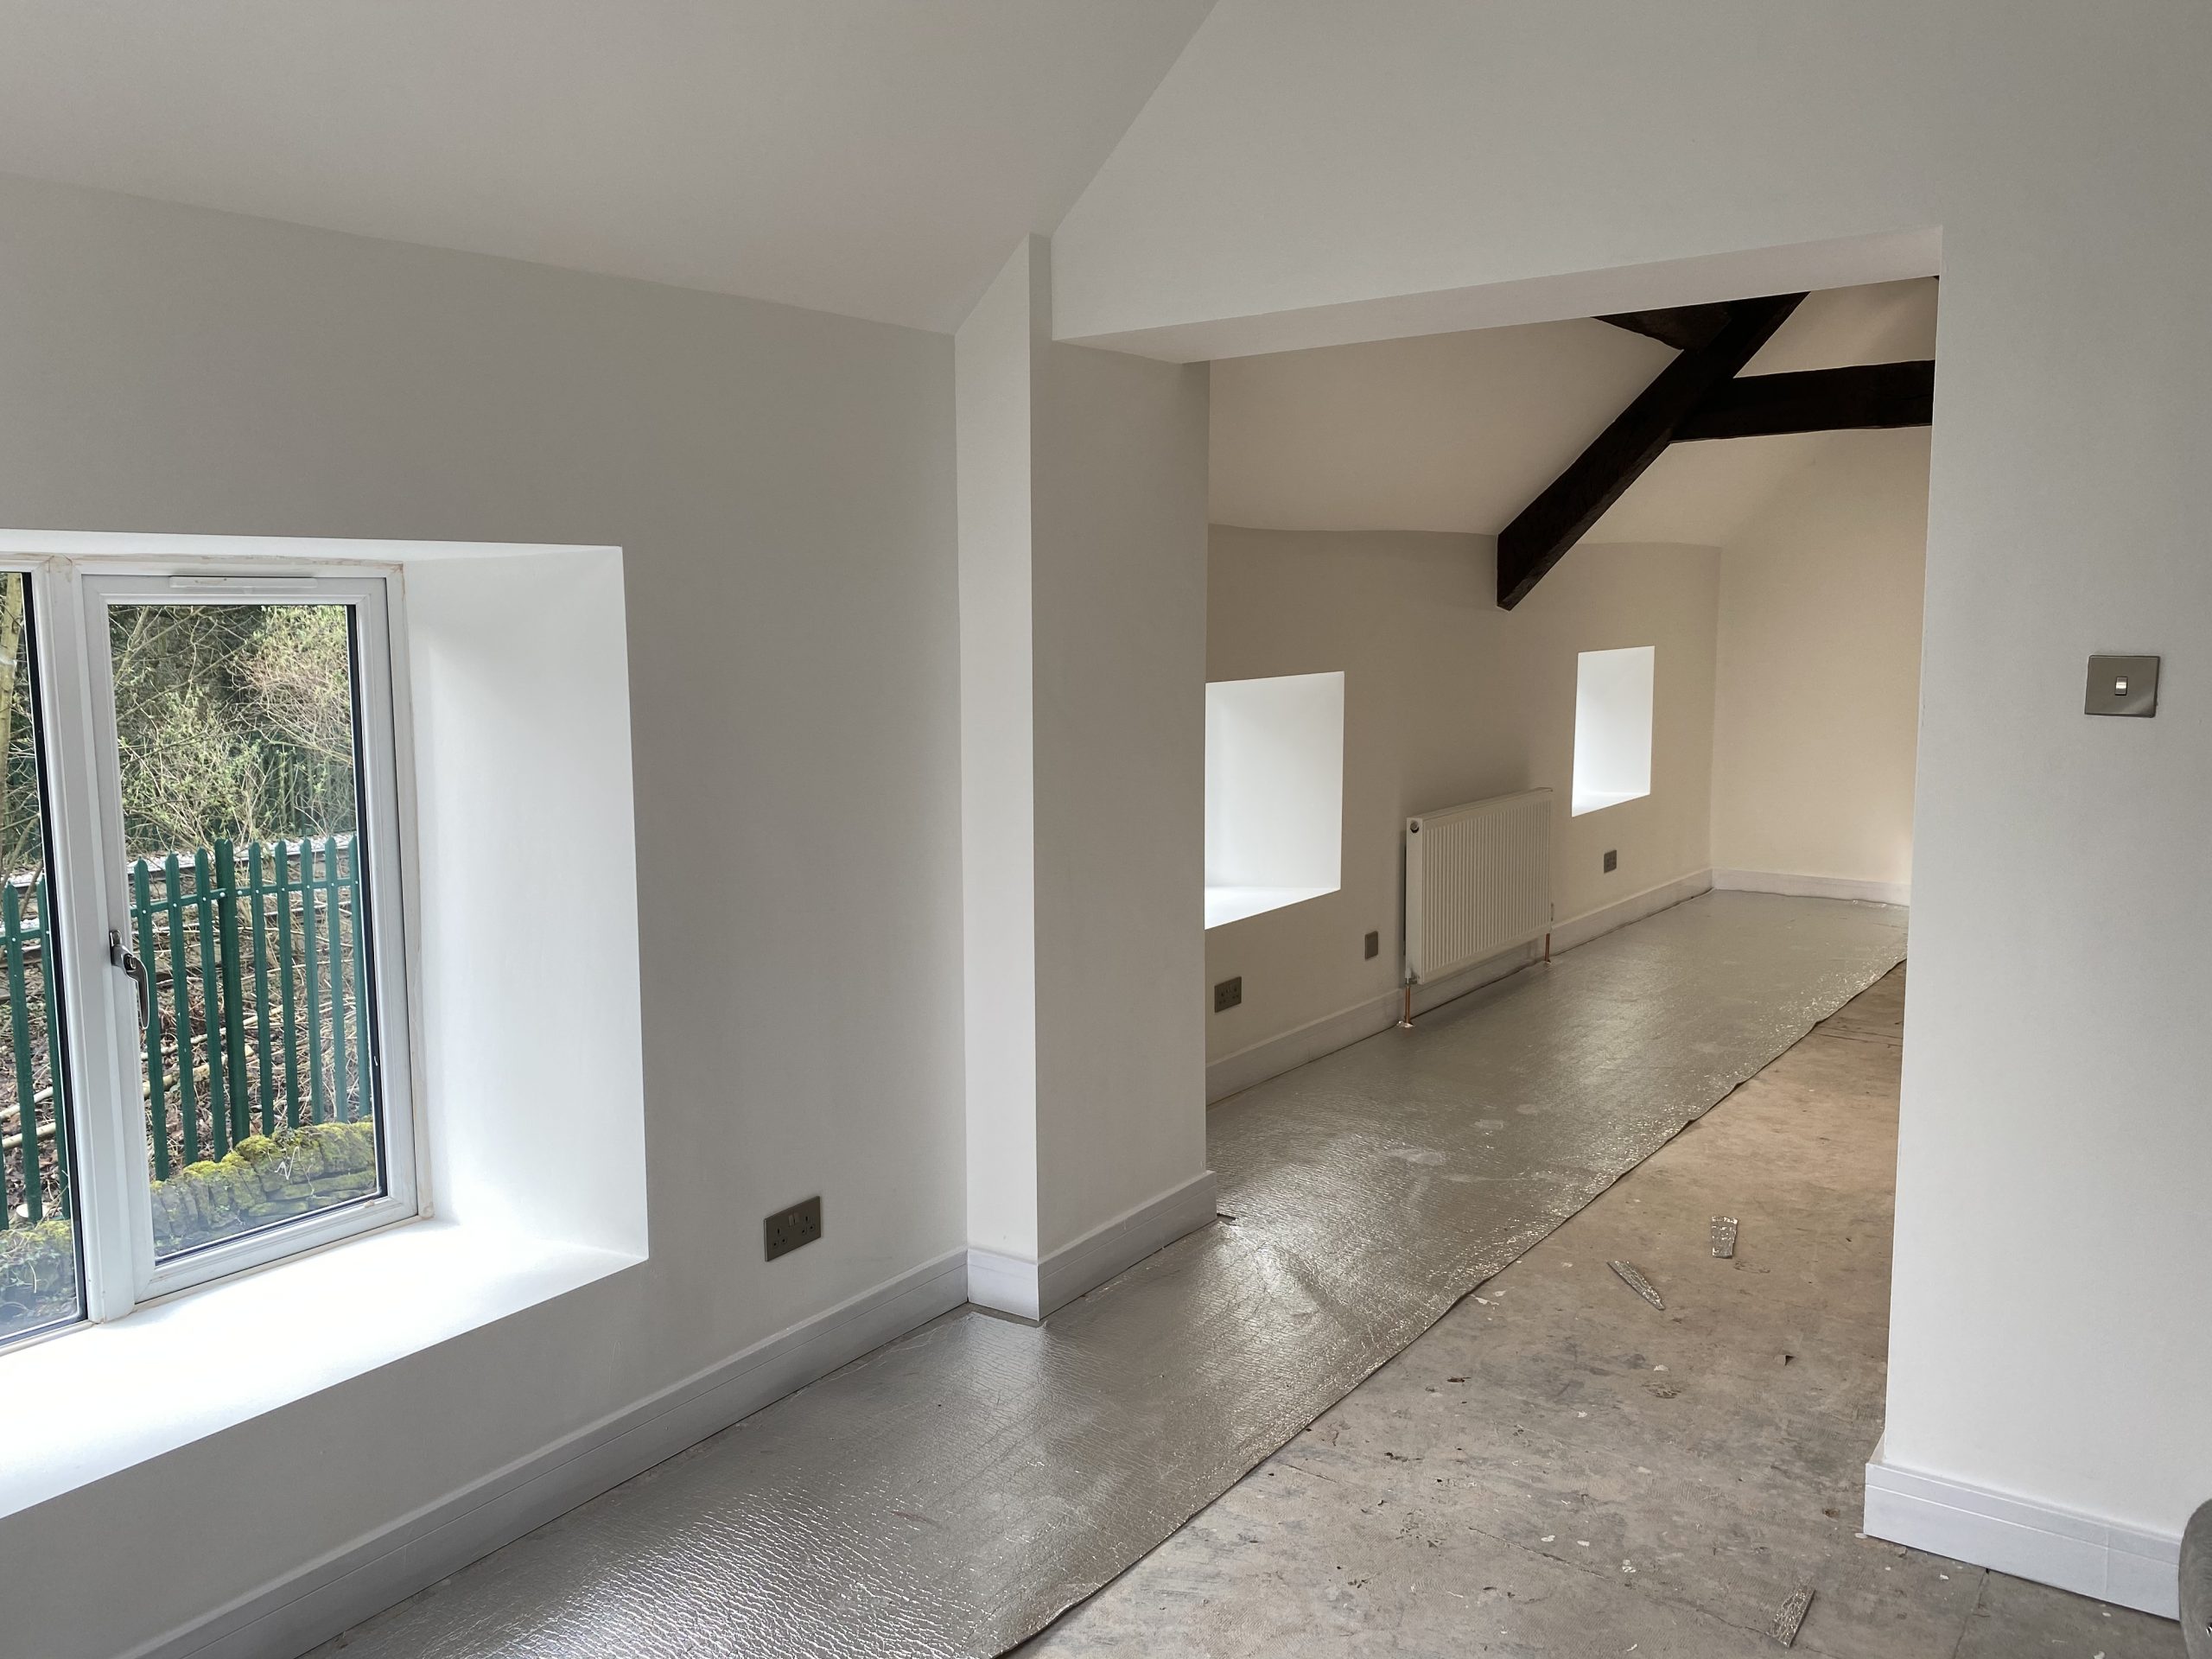
Eco-Tec FloorFoam on Timber Floors
How to install FloorFoam Insulation, on to Concrete
Unsurprisingly, you are unable to staple Floor Foam on to Concrete. The customer started in one corner but rather than stapling used Non-Adhesive Glue. This was to ensure that the Insulation stayed fixed to the Concrete. However, the joints and edges were sealed using Thermaseal Foil Joining Tape – which can be purchased by clicking HERE!
EcoTec FloorFoam on Concrete Floors
Insulating the Walls – With SuperQuilt
Given the amount of heat that escapes via the walls, the customer believed it was critical that the walls were insulated with a product that brings the most thermal efficiency. The customer opted to use SuperQuilt – which is one of the highest performing multifoils on the market. It has 19 layers, and true aluminium foil and compresses to just 7mm. It is a far superior to products such as Actis, TLX Silver & SuperFoil Insulation. YBS SuperQuilt Thermal Insulation is also UK Manufactured.
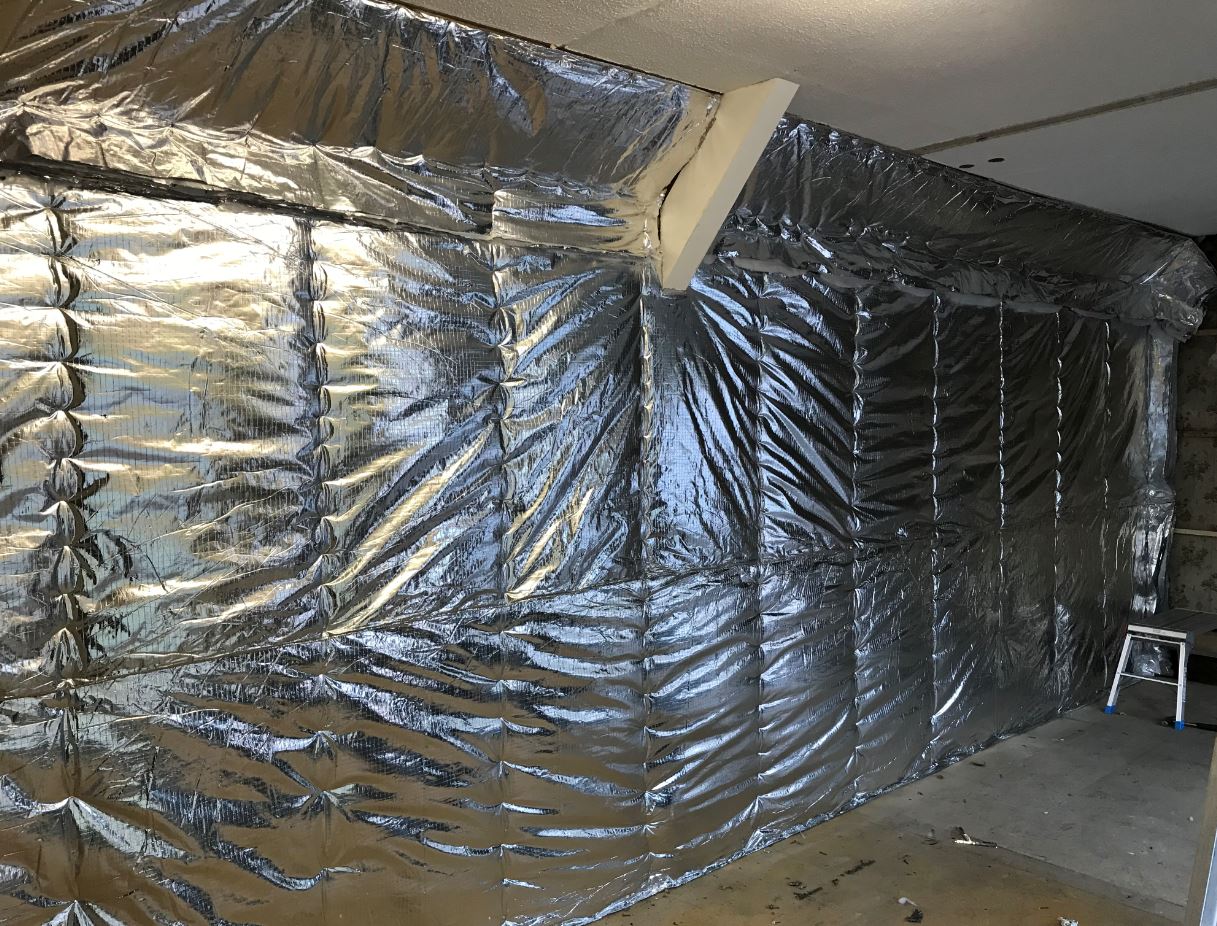
YBS SuperQuilt Solid Wall
How to Install SuperQuilt, on the Walls
The customer used 25mm Battens as advised and installed these vertically (even though battens can be installed either horizontally or vertically). The customer then applied 1 layer of SuperQuilt and stapled this on to the battens leaving a 30mm interval between each staple, with a Heavy-Duty Staple Gun.
After one line of SuperQuilt had been applied, the customer ensured that the second line of SuperQuilt he applied overlapped the existing line of SuperQuilt by 50mm to ensure that there would be no energy leakage.
Where the SuperQuilt overlaps, and around the edges tape was used – again to prevent any leakage which would hinder its thermal efficiency.
Taping and sealing SuperQuilt is extremely important. When fully taped it will work as a high performance Vapour Control Layer.
Once all the walls were insulated, the customer then drilled the secondary battens on top of the SuperQuilt and finished by installing plasterboard.
Insulating the Roof, at ceiling level with SuperQuilt
The customer applied SuperQuilt to the roof, he began by cutting the SuperQuilt to the width of the roof. Starting from the external wall, the customer unrolled the SuperQuilt so it was perpendicular to the joists.
The SuperQuilt was held in place with timber battens, leaving a 25mm air cavity above and below the product which minimises the effect of thermal bridging.
In this case, 1 Layer SuperQuilt was installed on the internal side of 200mm existing Mineral Wool / Glasswool. SuperQuilt can be used in conjunction with other insulation products for extra thermal benefits.
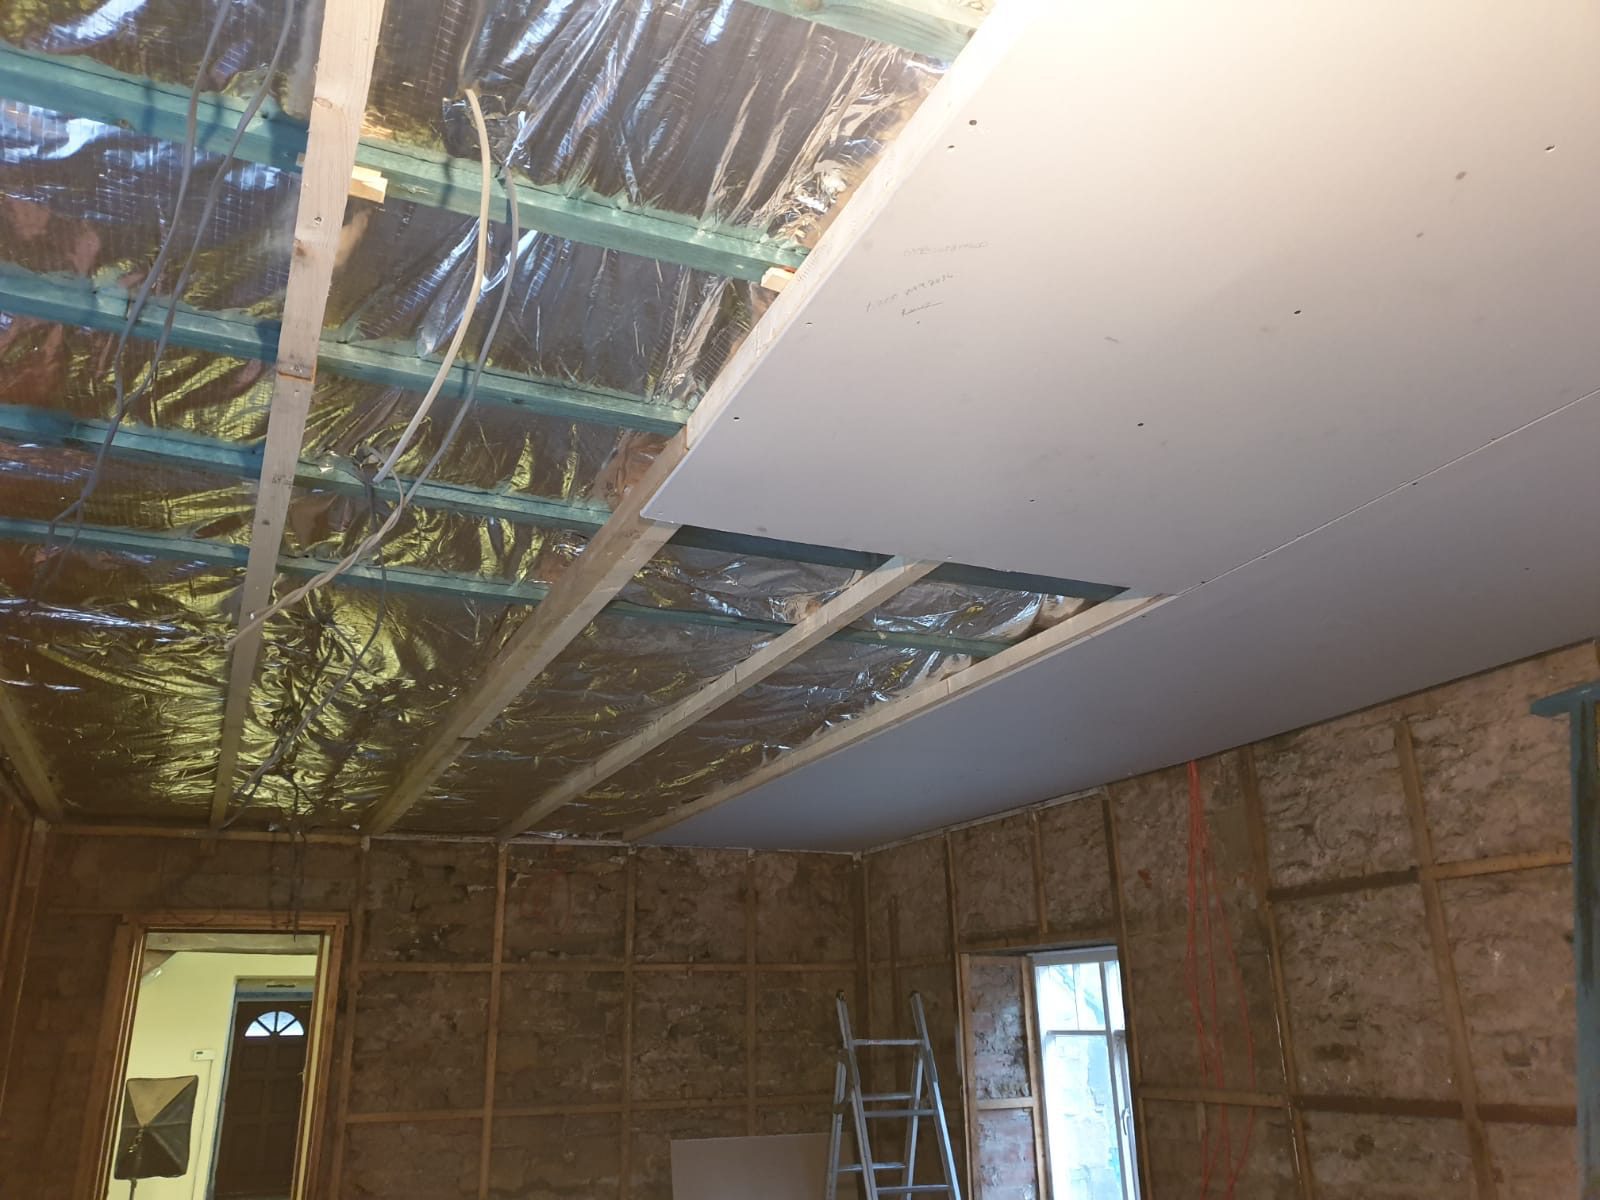
YBS SuperQuilt Ceiling Level
Insulating the Roof, at Rafter level with SuperQuilt
The customer applied the SuperQuilt horizontally and pulled it tight before stapling to the rafters. He stapled every 300mm (you can staple more frequently, but we would advise stapling at least every 300mm).
Again the customer overlapped the SuperQuilt by 50mm and sealed using the Thermaseal Foil Joining Tape.
The customer also had exposed beams, which were they were keen to keep exposed for aesthetic purposes.
In this case, the old plasterboard was already in place. The customer opted to install vertically battens between the purlins, followed by a complete layer of SuperQuilt (7mm Compressed).
The counter battens were then applied, prior to installing the plasterboard.
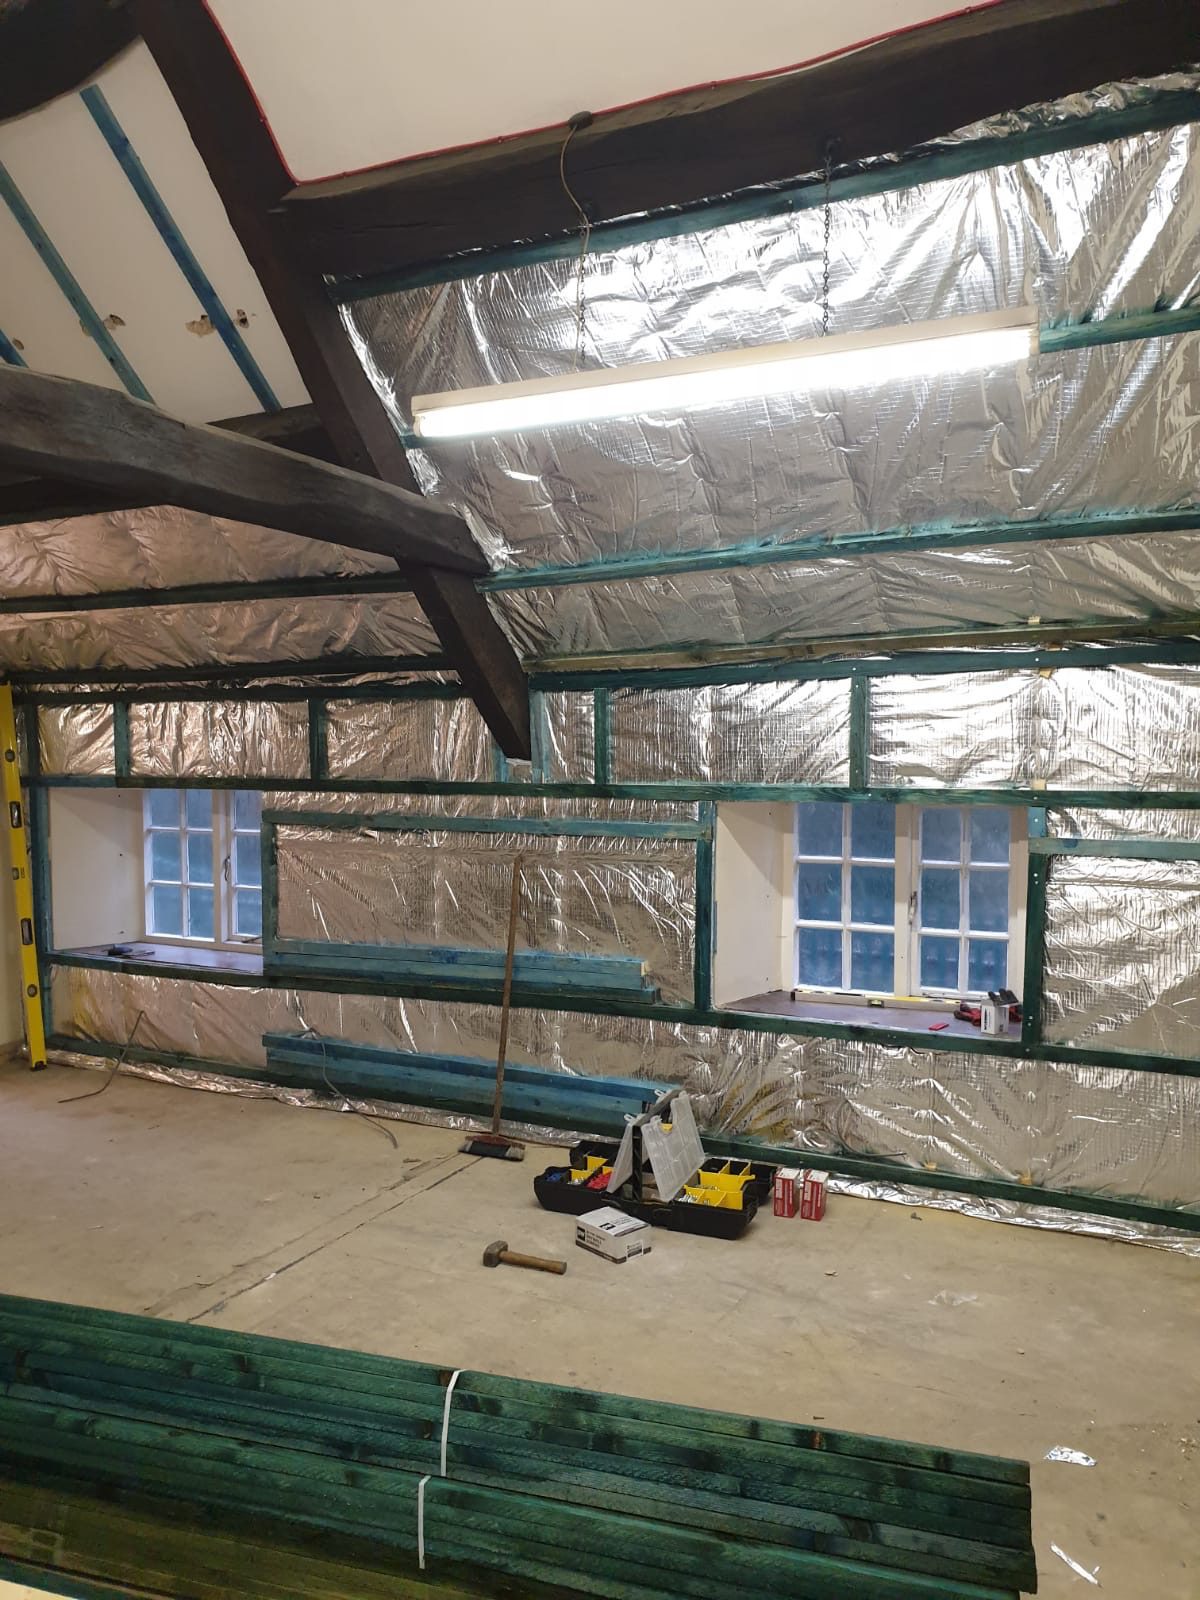
YBS SuperQuilt at Rafter Level
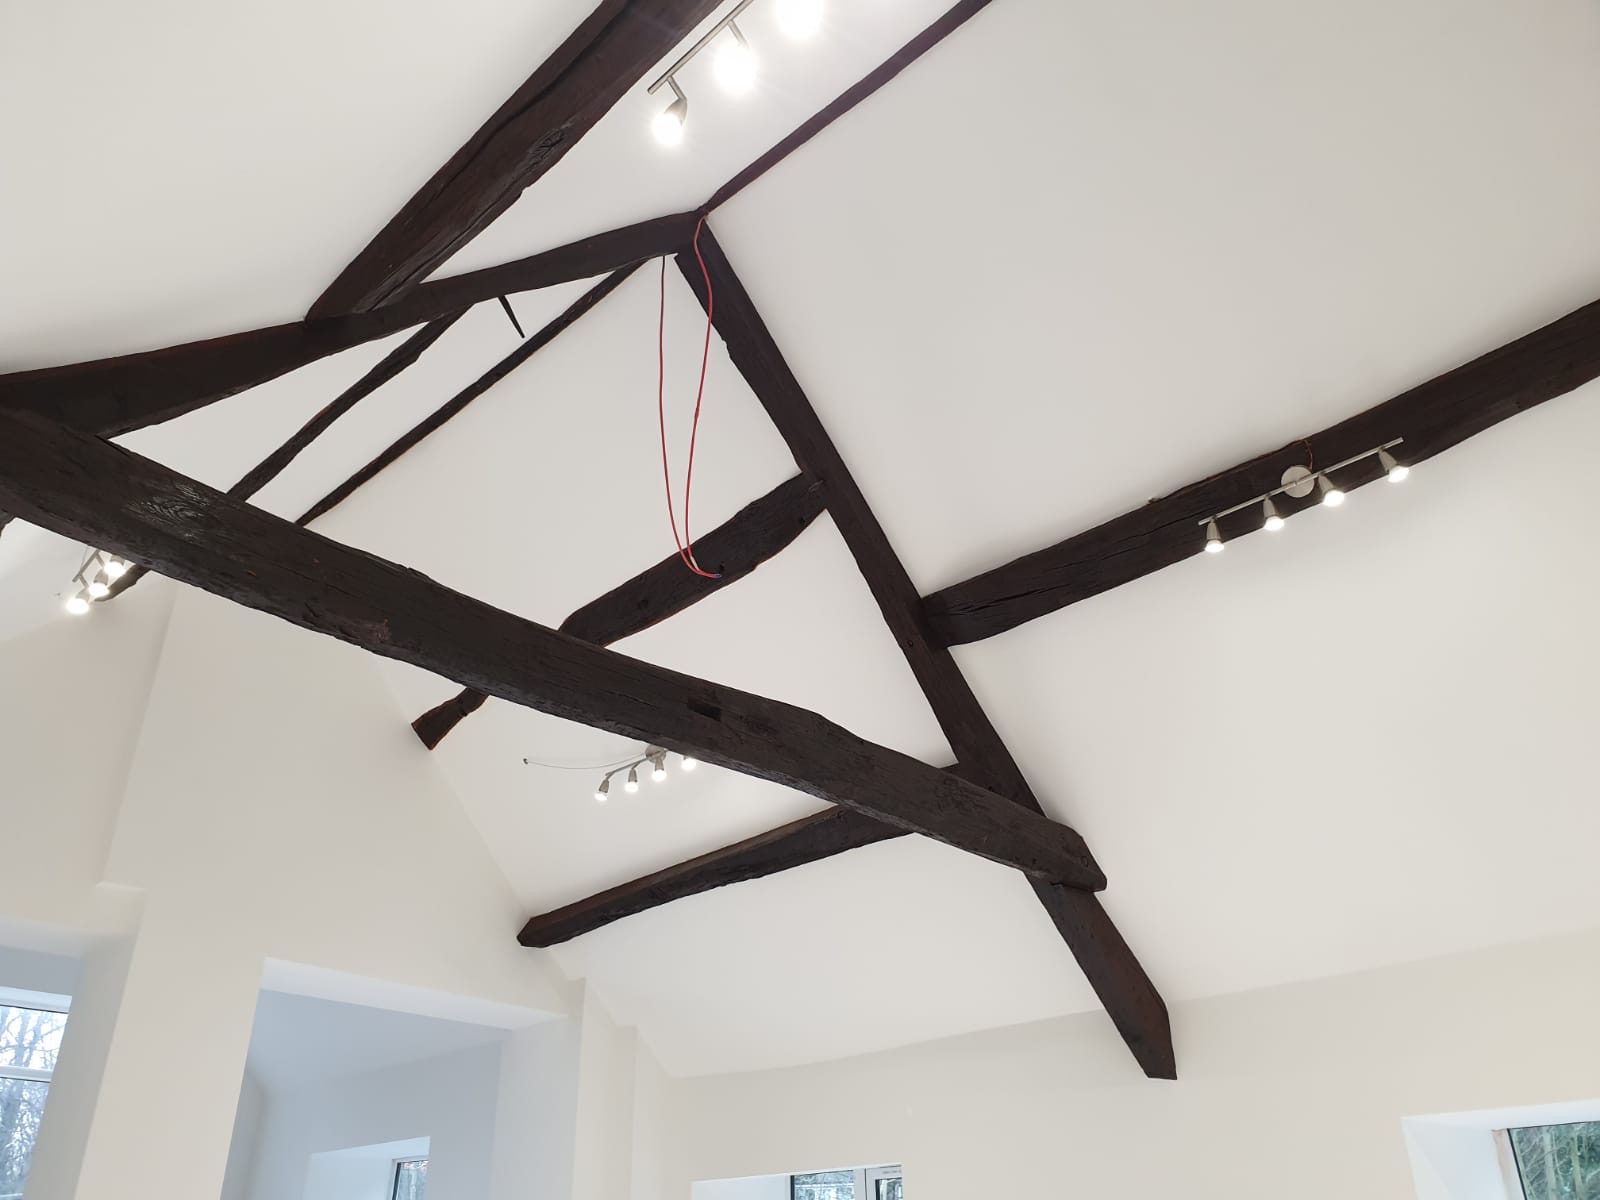
SuperQuilt Pitched Roof
If you would like to purchase any of the aforementioned products please press the below links.
To Insulate your Floor with FloorFoam – Click HERE
Purchase your Heavy Duty Staple Gun Kit, with 5,000 Staples – Click HERE
To Purchase Thermaseal Foil Joining Tape – Click HERE
To Purchase SuperQuilt Insulation – Click HERE
Or if you do need to satisfy Building Control Standards, use our FREE U-Value Calculator by pressing HERE
